Thursday, December 25, 2008
Snuck In Some Stamping Even on the 24th!
Those of you with older children in the family know how opening gifts just isn't quite the same as when the kids were little. Big-kid wish lists come with BIG price tags, resulting in a rather small number of packages to be opened. I usually try to find a few goofy little things to add to that one "gotta have it" item, just so I can see a glimmer of that "excited 4 year old" Christmas joy from years past. And I stamped my way to accomplishing that this year!
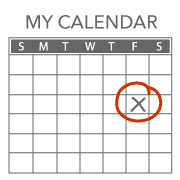
Part of the excitement of presents is that anticipation: "Who's getting that big box? What is rattling in that package? Could that be the ______ I really wanted?" I used to forego gift tags, just to keep everyone wondering, but I seem to have a harder time remembering what's in each box, so I can't do THAT anymore!! This year, I "coded" the gift tags, assigning a (stamped) number to each family member. It was then their job to figure out the significance of the numbers so they knew which packages belonged to them--because I told them they couldn't open anything until they figured it out! My plan worked beautifully!! It took them all a couple hours of thinking to crack the code, keeping them in "anticipation mode" for just about the right amount of time! They played "20 questions" with me right through dinner and kept thinking that I had invented some complex math problem for them to solve, when really the "code" was just the last digit of each of their cell phone numbers!
My other stamping project for the 24th pulled some "old friends" off the shelves of my retired stamp collection: "Espress Yourself" and "Alphabet Attitude Numbers." One of the kids' favorite treats while on their Christmas break ski trip is chocolate-covered espresso beans that they can get from a gumball machine in the warming house, so I decided to supply them with some quarters for their treats. I had wanted to put the quarters in spring-loaded Chuck E. Cheese token holders, just because I knew seeing those again would put a smile on their faces, but alas, even Chuck E. Cheese has come into the technology age! Tokens have been replaced with cards with magnetic strips! So I had to invent a "plan B." Mini M & M canisters to the rescue! I stamped some cardstock with coffee beans and filled in the blank spots by repeatedly writing "Time for a break" with marker. Used the dollar sign from the numbers set to decorate the lid and adhered it all with Sticky Strip. (LOVE that stuff!) "Laminated" the stamping with some clear packing tape and the canister was ready to fill. Unfortunately, there's far more room for quarters in an M & M container than a Chuck E. Cheese token holder, so I rolled up some singles (for hot chocolate) so the quarters wouldn't give themselves away during the "what could be in here?" process.
I'm happy to report that both teens thought these were pretty cool! Erik seemed impressed that I had hand-written all the "Take A Break" lines! ("No, honey, I don't have a stamp for that.")
Stamping wasn't the only creative thing happening on Christmas Eve day. We started somewhat of a new tradition by making our Christmas Eve dinner an appetizer buffet. Everyone selected one or two of their favorite appetizer recipes and we got cookin'! Melissa requested mini white-chocolate cheesecakes for dessert--and then proceeded to make them! She frosted them and added some festive red sugar sprinkles. It's a good thing I took a picture--because it sure didn't take long for everyone to register their seal of approval and empty the plate!
I hope you have a wonderful day with family and friends!
Monday, December 22, 2008
Today's top headline: "Paper-piercing Tool Saves Flurry of Snowmen!"
1. Mr. Snowman's face is a whole lot easier if a few circle punches are used to "cheat."
a) Punch a 1-3/8" circle from Shimmery White (or Whisper White) cardstock.
b) Pencil in where the eyes and mouth should go and punch those out with a 1/8" punch.
c) Punch a 1-1/4" circle from Black cardstock and adhere to the back of the "head."
d) Add nose. Viola! No muss, no fuss face!
2. Mr. Snowman's hat is SOOOOOO much easier with the assist of a paper-piercing tool! Arranging the little "berries" on the holly leaves was probably the most frustrating part of assembling these snowmen when we did them during stamp club.
Quite by accident I discovered that the ever-sticky nature of Mono Multi glue has its advantages. With just a touch of a paper-piercing tool (a large needle or pin would work too) to the "dried" glue on the outside of the bottle tip, I created the perfect "berry mover!" I put 3 small dots of glue where I wanted the berries to be on the hat, and then with my sticky paper-piercing tool, placed the little red circles on the dots of glue exactly where I wanted them. I was able to make a whole "flurry" (that's what I've decided a whole bunch of snowmen would be called) quick as a wink!
With as much fun as paper piecing can be, this trick should come in handy a lot!
Off to tackle today's to-do list! A quick reminder: tomorrow (the 23rd) is the last day to take advantage of Stampin' Up!'s free shipping offer!
Friday, December 19, 2008
"Let it snow, let it snow, let it snow. . . "
So, I imagine that a lot of you have been wondering where I've been lately! Trust me, I haven't been sitting around eating bon bons (unless you count caramel scraps!) "Santa" has been working fast and feverishly on all the homemade gifts that have become tradition at Christmastime here: lots and lots of caramels in (of course) hand-stamped packaging.
Every year 40+ packages of homemade caramels get sent to Mike's sales force and office staff, the kids' teachers, relatives, friends and neighbors. It gets to be quite the caramel factory here late in December!
The packages below are those that go to the kids' teachers. The tag on the caramel bag opens to hold a gift card. The "box" on the right is a carrier from a 4-pack of Starbucks Frappacino covered with Designer Paper that I had left from last year, embellished with Big Shot "Swirly" die cuts. Erik had ideas for several little things he wanted to give his orchestra teacher. She loves Starbucks, so we thought the holder would be a clever way to hold her gifts.
The gift card holder/tag is just a strip of cardstock 2-1/2" X 11", scored at 4-1/4" and 8-1/2". I rounded all the corners and secured the sides of the "pocket" with narrow strips of Sticky Strip.
Fortunately we were thinking ahead and delivered the gifts for the teachers yesterday, since Christmas break has started one day early.
I'm off to tackle something on the list! Stay safe and warm!
Tuesday, December 9, 2008
"Anything But A Card" Swap Projects
This first picture shows (left to right) the altered clipboards made by Barb W., notecubes made by Lora M., and Santa triangle boxes made by Christine M.
Barb's clipboards were all a little different, using various patterns of Designer Series Paper. They each included a mini legal pad and some gift tags, and were even "wrapped" with a flourish of toile or ribbon. So festive!
Lora's notecubes are almost too cute to use--but in this house, where we always seem to be scrambling for a piece of paper (even though one room here is FULL of it!), the cube will be put into service shortly. Lora special-ordered the cubes and then used the large stamp from the "Season of Joy" set to stamp the sides with red ink. She said she just held the paper together firmly while stamping and it worked great! A Christmas greeting on the top and some red gingham ribbon finishes the project perfectly!
Christine decorated the triangle boxes she made to look like Santa with the help of the Scallop and Word Window punches, as well as other cut paper shapes. It's as sweet as can be, especially because she filled the box with those fancy-flavored Hershey's kisses. Can't tell you which kind were my favorite because, um, there was a little chocolate emergency around here a few days ago, but they were yummy!
Carla P. decorated this "brag book" photo album with pretty holiday Designer Series Paper from the Holiday Treasures collection. Her added embellishments will make the holiday photos that we put inside extra inviting to everyone we share our memories with!
Laurie R. spent lots of time to make us all one of these beautiful tag-punch star ornaments. She found scrapbook paper that coordinated nicely with the Almost Amethest tag frames she made. The sparkles on the paper make the ornament a beautiful addtion to the tree!
This last photo shows the Santa "bag" that I made for swaps, the holiday planner notebooks and coordinating paperclip bookmarks made by Barb D., the sweet little Tic-Tac folders that Nancy S. made, and the rose vases decorated with rub-ons from Dale N.
The Santa "bag" that I made started out as a little box with 1-inch sides. I then wrapped red cardstock around the base of the box and added punched details to make the project look like Santa's coat. (Sticky Strip is a must for this project!) I'm sure I found the majority of my inspiration on Splitcoast or somewhere, although I'm not really sure right now. Of course, I had to tuck a few caramels inside for good measure.
Barb D. not only decorated the notebooks she swapped, she MADE them from scratch! The "centerpiece" details on both the notebook and the bookmark are punched stamped images. The one on the notebook is from the current Hostess Set, "Punches Three."
I had Nancy S.'s little "snowman guy" displayed on my desk and it even caught the attention of my 16 year old son! I have a feeling that the Tic Tac's had a little something to do with it, but the fact that he even saw the snowman amid all the other projects says a lot! I love how the little "book" that wraps around the mint container cleverly has a circle punched out on the bottom to show the mints.
Dale N. used Stampin' Up! rub-ons to dress up simple glass vases. The rub-ons are water resistant so the vase can be used and even hand-washed without worrying about ruining the rub-on design. She added glass marbles, gingham ribbon and a realistic-looking silk rose to finish off her gift swap.
See what I mean about how Christmas comes early at our December Stamp Club meetings? It's wonderful! Thanks again to all!!
Now, being that this is the blustery stuff that I'm seeing out my window right now. . .
. . .I suppose it's time to go fire up the snowblower again!
Let me know what you think of that retiring stamps list!
Sunday, December 7, 2008
Christmas Punch Art
And as if on cue, an email that I received from one of my online swap group members, Laura Lipe, contained a picture of a punch art gift bag she made. She saw a the punched singing reindeer idea on someone's blog and made it a trio to cover the bag. The "antlers" were made using the "swirls scribbles" Sizzlits die and the Big Shot. Cute beyond belief!
Friday, November 28, 2008
Christmas Wish List Program
If you happen to have people in your family who are also reluctant to hit the mall, I've got a way for them to get you just what you want without having to leave the house. Click on the picture of Santa and his list (on the right) and print out the form. Fill in your choices and leave in a strategic spot--under a cell phone, a set of keys, or in a favorite reading spot, perhaps? Could we make it any easier?? Double Bonus!! Have Santa get his order in by December 1st and you can take advantage of the Holiday Extravaganza sale!!!
Thursday, November 27, 2008
Happy Thanksgiving!
I have one last fall-themed card to share with you, one that I saved just for today. Designed by Jennifer Strauss, I received it in a swap I participated in earlier this fall. I really like the layout. It allows for lots of possibilities for usage of scraps and can easily be translated into a card for any occasion. The ribbon is also added to the card in a little different way. (see photo below for details) I really like this card too, because of the sentiment: "Happy Thanksgiving, happy fall, happy blessings to one and all!"
Wednesday, November 26, 2008
Holiday Extravaganza Sale
Monday, November 24, 2008
We Interrupt This Blog for a Date With the Snowblower. . .
This is the sample we used for inspiration. It uses the "Lovely As A Tree" and "Heard from the Heart" stamp sets, Handsome Hunter, Ruby Red, Brushed Gold and Whisper White cardstock, and Handsome Hunter, Ruby Red and Encore Gold ink.
And this is Ann's end result. She switched out both stamp sets, using the tree from"Snow Swirled" and the "Merry Christmas from "Season of Joy". The card's simplicity is beautifully elegant--and made it a snap for her to get 50 cards and envelopes stamped in just a couple of hours. She was so excited and can't wait to mail out her cards to family and friends.
(If you're still thinking that you'd like to stamp some holiday cards, give me a call and we can get you headed in the right direction. It's not too late.)
Well, unfortunately, it might be time for me to go out and decide what method I'm going to use to clean up the driveway. Doesn't look like "melt" is going to be one of my options today.
"Talk" to you tomorrow!
P.S. SPECIAL thanks to Laurie for the use of her battery charger! You're a lifesaver!
Thursday, November 20, 2008
So, What Do You Think I Did With My Battery Charger??
Well, that's not to happen this morning! I was all excited! I found a way to use Tangerine Tango on a card! A card that used the beautiful mums that I found in the "3 for $10" bucket at the grocery story as inspiration! And when I go to take a picture, the screen says, "Change Battery Pack." Okay, um, yeah. Where might I have put that?" I have NO IDEA! I don't think I've had to charge the battery since we were on vacation this summer!
So, in order to share my mum-inspired, Tangerine Tango creation, I had to rely on the ol' stand-by (not so hot) camera and the scanner, neither of which are doing my creation, or the mums for that matter, any justice. I'll just have to wait until the teens get home and then maybe I will be able to take a decent picture. If not, I might have to bother my good stamping friend, Laurie, 'cuz she just happens to have the same camera I have! Maybe I can barter some cardstock for a battery charge!
Anyway, I arranged the mums in my turkey "vase" with hopes that they last until Thanksgiving. The colors that came together in one package were just incredible. So I decided to "save" them on a card. Let me tell you, my first idea was WAY too involved--punched flowers, scalloped edges, too much stuff. What a mess I made in four short minutes. Time for a different idea. I scaled it back and went with super simple.
The card uses the "Poppin' Pastels" technique with the large stamp from the "Upsy Daisy" stamp set. Stamp the image with Versamark ink and add colored chalk ("pastels") with a q-tip or sponge-tipped eye shadow applicator. The colors seem to blend themselves as you add more color. Any stray chalk can be removed with a clean, soft eraser. I used the Earth Elements family of chalk, mostly Summer Sun, Ruby Red, Really Rust and Garden Green. I threw a little of the Bravo Burgundy (from the Rich Regals family) in there because my mums had a few of a deep, deep red variety.
On to the project du jour: carpet cleaning. yippee. . . I'd so much rather be stamping!!
I will be back later, however, when I can get a decent picture posted. Hope you have a great day!
Tuesday, November 18, 2008
Not really stamping--but we used cardstock!
Melissa loves how her mirrors turned out. There's another set hanging just to the left of the shower.
Oh, and I mentioned that this project used cardstock. So, here's how. . .
We mapped out where each mirror (and corresponding painted circle) should go with circles of Green Galore, Ballet Blue, and Gable Green! It helped us choose our paint colors and allowed for perfect circle placement. Melissa then used a compass to draw the circle on the wall before we painted.
I promise to use cardstock to make a card tomorrow!
Monday, November 17, 2008
Oh, wow!
Melissa and I made progress with our bathroom re-do, taking plenty of time along the way to admire our handiwork, :-) the minivan finally has some new tires, I layered on warm clothes and plugged away at yard cleanup, and I got to "work" in my craft room, puttering away on some swaps, prep for last weekend's stamp camp, and a little surprise for my stamp club members. Can't show you the surprise just yet, because there are a couple gals who don't have theirs yet, but I'll try to remember to show you later this week.
What I can show you is the other project the Stamp Clubs did at their November meeting. Each month we focus on a different technique and everyone in Stamp Club takes home a "technique card" that can be used later to recall just how to do what was learned. This month the technique was "Markers on Vellum." We used the "A Christmas Cardinal" stamp set from the Holiday Mini Catalog, embossed the cardinal on a piece of vellum (that was cut with the "Top Note" Big Shot die), and colored the image on the reverse side using markers, thus the highly-technical technique name!!! Kiwi Kiss and Riding Hood Red, two of this year's "In" colors gave this Christmas card an up-to-date look.
A reminder that if you'd like to start YOUR collection of technique cards, new stamp clubs will start up in February with the launch of the Spring/Summer catalog. I'd love to have you join one of my clubs, so let me know if this interests you and I can fill you in on the details.
One other thing that I puttered with this week isn't really stamping-related, but I'll share anyway. I was intrigued by a local news story last week that featured a website showcasing handmade crafts and I had to check it out. Etsy.com allows crafters of all kinds to offer their products for sale. I've often had people tell me that I should sell the caramels I make, but I'd never taken the time to try it--until today. I put together a listing, calling it "CaramelsToDieFor". We'll see what happens. The kids were just excited because I had to make a batch in order to take the pictures--they told me they would have no trouble taking care of the "used" caramels for me!
Have a great week!
Tuesday, November 11, 2008
47 Shades of White!!!
Yeah, that's what we thought until we started putting the white on the wall. . . and then it was off to the store again. After collecting a whole deck of paint chips, all of them proclaiming to be white, it took an hour of decision-making to finally pick what would work! (Do we REALLY need 47 different shades of white???)
Anyway, I decided to turn the whole rather-frustrating process into another "excuse of the day" and went to work making this card that only uses shades of white.
I grabbed some Whisper White, Very Vanilla and Shimmery White cardstock, my "Priceless" stamp set (only because I hadn't used it in forever), checked the ribbon drawer to see what my options were, and set out to see what might happen. I used white craft ink, stamped on the vanilla cardstock, and embossed with white embossing powder.
Then to add some texture while staying within the parameters of my "excuse," I ran some Shimmery White cardstock through my crimper twice, once in each direction, to produce sort of a "waffle" look.
To create "wide" taffeta ribbon, I placed two lengths of vanilla taffeta next to each other and then added a piece of white taffeta over the top to hide the "seam."
I used Dimensionals to adhere my center piece over the ribbon. A trick to use if you have difficulty getting the backing off of Dimensionals: push your thumb nail into the Dimensional to create a crease in the backing paper.
Don't know if I'll use this card for a wedding, or if it'll just be a notecard, but I was pleased with the results of "going all white."
Guess I'd better get back to my paintbrush!
Monday, November 10, 2008
Okay, so this isn't exactly what I had in mind. . .
So, over the weekend I set out to add a slideshow of holiday card ideas to this blog. I had a nice variety of samples thanks to all the talented stampers I've swapped with, and so far I've been able to navigate through all the clicks and downloads and HTML gobbledygook without completely pulling my hair out. I thought I'd just add a scrolling collection of cards over there in the right-hand column, just like I've seen on other stamping blogs.
Well, just call me the "little-too-confident-new-blog-builder!" After puttering around for most of today, watching time literally fly as I proceeded to reload, resize, rename and retry what I had in mind, I've decided to REDEFINE my expectations!! I'm sure I'll figure out how to get it over in the column at the right--or maybe one of you can clue me in--but it just won't be today!
Anyway, back to something I do know! Even before I had a collection of rubber stamps I made the holiday cards I sent to family and friends. Once such card involved a handmade stencil and a can of blue spray paint, before I had any idea of how much overspray even a small spritz of paint created! Ah, memories! Good thing my crafting area at the time was a college-rental and not my dad's garage floor!!
The neat thing about making your own Christmas cards is that it allows you send cards that reflect your personality and interpretation of the "perfect" Christmas card. I have a friend who never fails to send a red-and-green card, "because it wouldn't be Christmas" any other way. Another friend loves to enjoy the trends of the current season, surprising everyone with a new color combination each year.
No matter what says Christmas for you, you can include it in your design--and no, it's not too late to make cards for this year. Take note of the things you like about the card ideas below. The label you see on each of the cards in the slideshow designates the primary stamp set that was used to create it. If you see an idea or a stamp that interests you, whether it be here or from some other inspiration, I'd be more than happy to help you with the details to create the card that is just perfect for you.
Enjoy the show!
(Sidenote--Did you know that "gobbledygook" REALLY is a word?? And here I thought it was just one of those crazy words we used in my family!)
Thursday, November 6, 2008
Presto! Chango! Secrets of a SU! Demo!
This month's "quick 'n' easy" card featured the "With Gratitude" and "Define Your Life" stamp sets and the awesome "Autumn Vine" Designer Series Paper that is in the current Holiday Mini Catalog. My "Define Your Life" set was a little dusty and begging to be used, and the colors in the "Autumn Vine" papers are so yummy I needed to use them before we get totally consumed with Christmas trees and snowflakes.
The dilemma I face when designing group projects that use Designer Papers is, that even though I've become a pro at getting lots of cards out of one sheet of 12 X 12, often the two sheets of each pattern don't always stretch far enough and I have to make project modifications. This was one of those months.
My stamp club members don't know it (until they read this!) but the evening club did a slightly different card than the morning club. Because the DSP patterns all coordinate with one another, it's not really that difficult to use the same colored card base and the same layout with different patterned paper. In this case I had to switch out the ribbon color too, because my much-loved roll of 5/8" Chocolate Chip grosgrain ribbon was no more. I think the Very Vanilla ribbon works just as well--how 'bout you?
To stamp the leaf, we inked up the stamp with the More Mustard ink pad and then added Really Rust ink and just a touch of Chocolate Chip ink with daubers. As with so many stamping projects, all the leaves looked just a little bit different but equally great! The "gratitude" stamp ("Cause of happiness or joy. Expressing appreciation for something or someone") from the "Define Your Life" set works equally well for a Thanksgiving card or a thank you note. (Paper dimensions: Whisper White/Very Vanilla: 2-3/4" X 3-3/4"; patterned paper #1: 3" X 4"; patterned paper #2: 4-1/4" X 2")
To add the ribbon embellishment, wrap a 6" piece of ribbon around the patterned paper, adhering the ends of the ribbon on the backside of the paper. Tie a single knot in another 6" piece of ribbon and trim the ends to make the "bow." Add this to the card with a couple Mini Glue Dots.
One other idea for getting the most from a package of DSP: Piece scraps together if the seam can be hidden under another element. I had several scraps that were too small to use on this project by themselves, but when I taped them together and cut them to size, I was able to get a few more of these cards made. The tape gets hidden under the leaf element.
I'm thinking about making some quick Christmas cards using this layout, either the "wish" or "memories" definition, with the Christmas tree from "Season of Joy" and the "Holiday Treasures" DSP.
Hope you had the chance to do something creative today.
Wednesday, November 5, 2008
Upcoming Holiday Gift Class: Noel Wall Hanging
I AM hoping however, that you won't think I'm jumping the gun too much with this Noel Wall Hanging class. Afterall, planning ahead for handmade gifts is a GOOD thing! See the details below, and let me know via email which day you're planning on attending, or if you have questions.
Monday, November 3, 2008
Election Day Inspiration!
So I'm making my "excuse of the day" today be Election Day! Since this election will result in new faces and new ideas, I decided to use that same theme in my stamping today. I pulled out some Stampin' Up! new "faces" ("Starring You" stamp set, Big Shot dies Scallop Circle and Scallop Circle #2, In-Colors Riding Hood Red (RHR) and Pacific Point, and Pacific Point striped grosgrain ribbon) and came up with this idea for a birthday card with a bit of a patriotic feel!
I made the base for this card by running a typical card base through my Big Shot with the Scallop Circle die, making sure that the fold of the card was below the scallop cutting line so I'd still have a card that could stand up. Then I cut a circle that is about 3-3/4" in diameter out of Pacific Point. A star-stamped scallop circle (from the scallop #2 die) and the grosgrain ribbon are layered on that. I stamped two of the "Happy Birthday/star" images, one in Pacific Point, one in RHR, and used the 1-1/4 circle punch on the Pacific Point image, freehand-cutting (gasp!) the RHR image. Adhered those together, added some glitter around the edge and used Dimensionals to add it to the card. And the best part of the whole thing may be that now I have a rather masculine-looking birthday card made BEFORE I need one!
Have a great day! Make sure you vote!!
Sunday, November 2, 2008
Bad khaki pants got me stamping!
A trip to the mall resulted in the much-needed pants and some other items, including a couple of new belts. Properly storing these new belts required a trip to find some sort of hook system, as the old system was failing miserably. In the process of looking for a suitable way to hang the belts, I happened to come across a very nice-looking rack of hooks that would substantionally upgrade the towel rack in my son's bathroom.
After an afternoon of removing the old towel rack, patching the wall, and installing the new set of hooks, it became painfully obvious that this improvement now made painting the wall a necessity. I mentioned this to my daughter, Melissa, and a whole new chapter (read: big project!) unfolded! Before I knew it we were looking at bathroom accessories, searching for the inspiration we needed to redo Erik's bath! And before I knew it, Melissa was telling me that she thought some version of Gable Green would be a great idea for the new paint color. Erik said he didn't care what color we painted the bathroom--AS LONG AS IT WASN'T PINK--but I'm not sure this shade of green is what we should be putting in a basement bathroom.
Decorator Melissa's vision for this room came from the liner of a storage basket we found (see striped fabric in photo)--except that she didn't like stripes; she wanted dots. We found some different-sized round mirrors to hang on one of the walls, and Melissa decided that painting a colored circle around each of the mirrors would be a cool thing. Okay, that has potential. So off we were to look at paint samples. . .
Hey! I spent last weekend shopping for menswear, and now this weekend is all about a bathroom??? That was when I decided that I needed to take a few minutes to get in some stamping!!! So, inspired by the mirrors, the dots, and the paint samples we brought home, I grabbed some cardstock, chose a layout sketch from this site I'd saved in my favorites, and got busy. I'm proud to say that 15 minutes later I had a finished card! Man, that was fun!!
Details: Stamp Set--Full of Life; Paper--Certainly Celery, Brilliant Blue, Brocade Blue, Baja Blue, Whisper White; Ink--Brilliant Blue, Versamark; Other--Silver Embossing Powder, Circle punches (1", 3/4", 1/2"), Brocade Blue 5/8" grosgrain ribbon, silver elastic cord, Dimensionals.
I covered a piece of Whisper White cardstock with Versamark and two rounds of silver embossing powder so that I would have some "representation" of the mirrors that are slated for this redecorating project; I just punched circles from the embossed piece. Three strands of silver cording put together took the place of the silver ribbon I would have liked to have. And I just had to use the John Lennon quote on the card, since it so typifies what my days have been like lately.
It was great fun to "sneak" a stamping project into the end of the afternoon. I highly recommend it!
I'll let you know how the redecorating comes along!
Friday, October 31, 2008
Halloween--Stampin' Up! Style
Check out the link below to see how the Stampin' Up! staff at the home office celebrated Halloween during their lunch hour. There are some awesome pictures and a short video of some of the creative people responsible for the happiness we find between the covers of the SU! catalog! We're usually treated to some of their musical talent at SU! events--it's great to get a snippet at home.
http://kwernerdesign.com/blog/2008/10/halloween-2008-stampin-up-style.html
Happy Halloween!
I love all the detail that Barbara Faulkner put into the card at the right! She used "Season of Friendship" and "Halloween Frights," both from the Holiday Mini Catalog, to create this spooky scene. This picture doesn't do justice to the glossy cardstock background, but the fence was stamped in Stazon, a circle mask was added to create the moon, and then Not Quite Navy and Close to Cocoa inks were brayered on. Both the tree and the owl were stamped and then cut out before being added to the card, which adds great depth. The owl was adhere with a Dimensional, and even has two Crystal Effects dots for eyes. Summer Sun ink was daubered in to color the moon, with a little Pumpkin Pie dotted in to really make it glow. Add two bats and it's done.
This next card, designed by Andrea Bareis, is cool--because other than Glenda, the Good Witch (of Wizard of Oz fame), I've never really thought of witches as glitzy characters--but this fashionable witches' hat (from the "Eat, Drink & Be Scary" set) is bewitchingly be-dazzled! Andrea used some Chunky Sprinkles glitter on the "ribbon" of the hat (underneath the brad) and the irridescent quality of the glitter adds just the right touch! (Other details: background design: Ghostly Greetings Designer Series paper. Accessories: Kiwi Kiss Striped Grosgrain ribbon, Vintage brads, black embossing powder, Dimensionals.)
Here's another card that uses glitter! Scheli Abraham used embossed images from "Halloween Frights" over those cool circles from "Pick A Petal" and layered them on top of Kiwi Kiss and Perfect Plum cardstock, and some designer paper from "Ghostly Greetings." She added the "bling" by first putting down some Sticky Strip and then sprinkling Fine Cosmos glitter on top. A little piece of Tangerine striped grosgrain tied once to make a bow and it's ready to go!
Thursday, October 30, 2008
Ready, Set, Here Goes Nothing. . .
I hope to use this blog to keep you updated on stamping opportunities and ideas you can use for projects, as well as Stampin' Up! promotions and specials. With having two main catalogs plus Occasions and Holiday mini catalogs every year, there's a lot to keep up with, and I don't know about you, but taking it in little chunks seems to be working better for me lately! AND if my blog posts don't go *poof* into cyber space like some of my disappearring newsletter entries, that'll be an extra bonus!! Let me know what you think!