The new Summer Mini Catalog starts next Saturday, May 1st, and so as is usually the case before the launch of something new, I was under the gun to get swaps designed and in the mail. I always seem to think I have plenty of time. . . and then find myself wishing my SUV had wings so I'll make it to the post office before it closes! Fortunately, I do plenty of reading on Splitcoast and know that I'm not the only person who does this!I needed two designs for the swaps I signed up for. I decided that I was going to challenge myself to use new stamps that no one else had selected for their swaps, and also that I would use only colors that were not going to be retiring. That turned out to be a little more challenging than I thought--since I had already sketched designs for some of the new floral sets (which won't go to waste, of course), AND I found that I still have a little "work" to do in coming to terms with losing some of my favorite "go-to" colors. But with the deadline looming, I got to work. I used the new "Builder Wheels" (p. 8-9 of the Summer Mini) for both of my swap designs and in the process discovered that I love them even more than I thought I would. The "wheel spindle and spacers" that the new thinner-style wheels go on is very well designed so you can use one, two or three of the wheels at a time, but because the wheels are quite narrow, rolling just a single takes a very steady hand (that I evidently don't have based on my pile of boo-boo's!), so I'll be using at least 2 of these new wheels together. The triple-cell cartridge has plastic spacers between each of the 3 foam pieces so the 3 colors you load don't bleed together. LOVE that and will be adding a ton of these new cartridges to my collection!
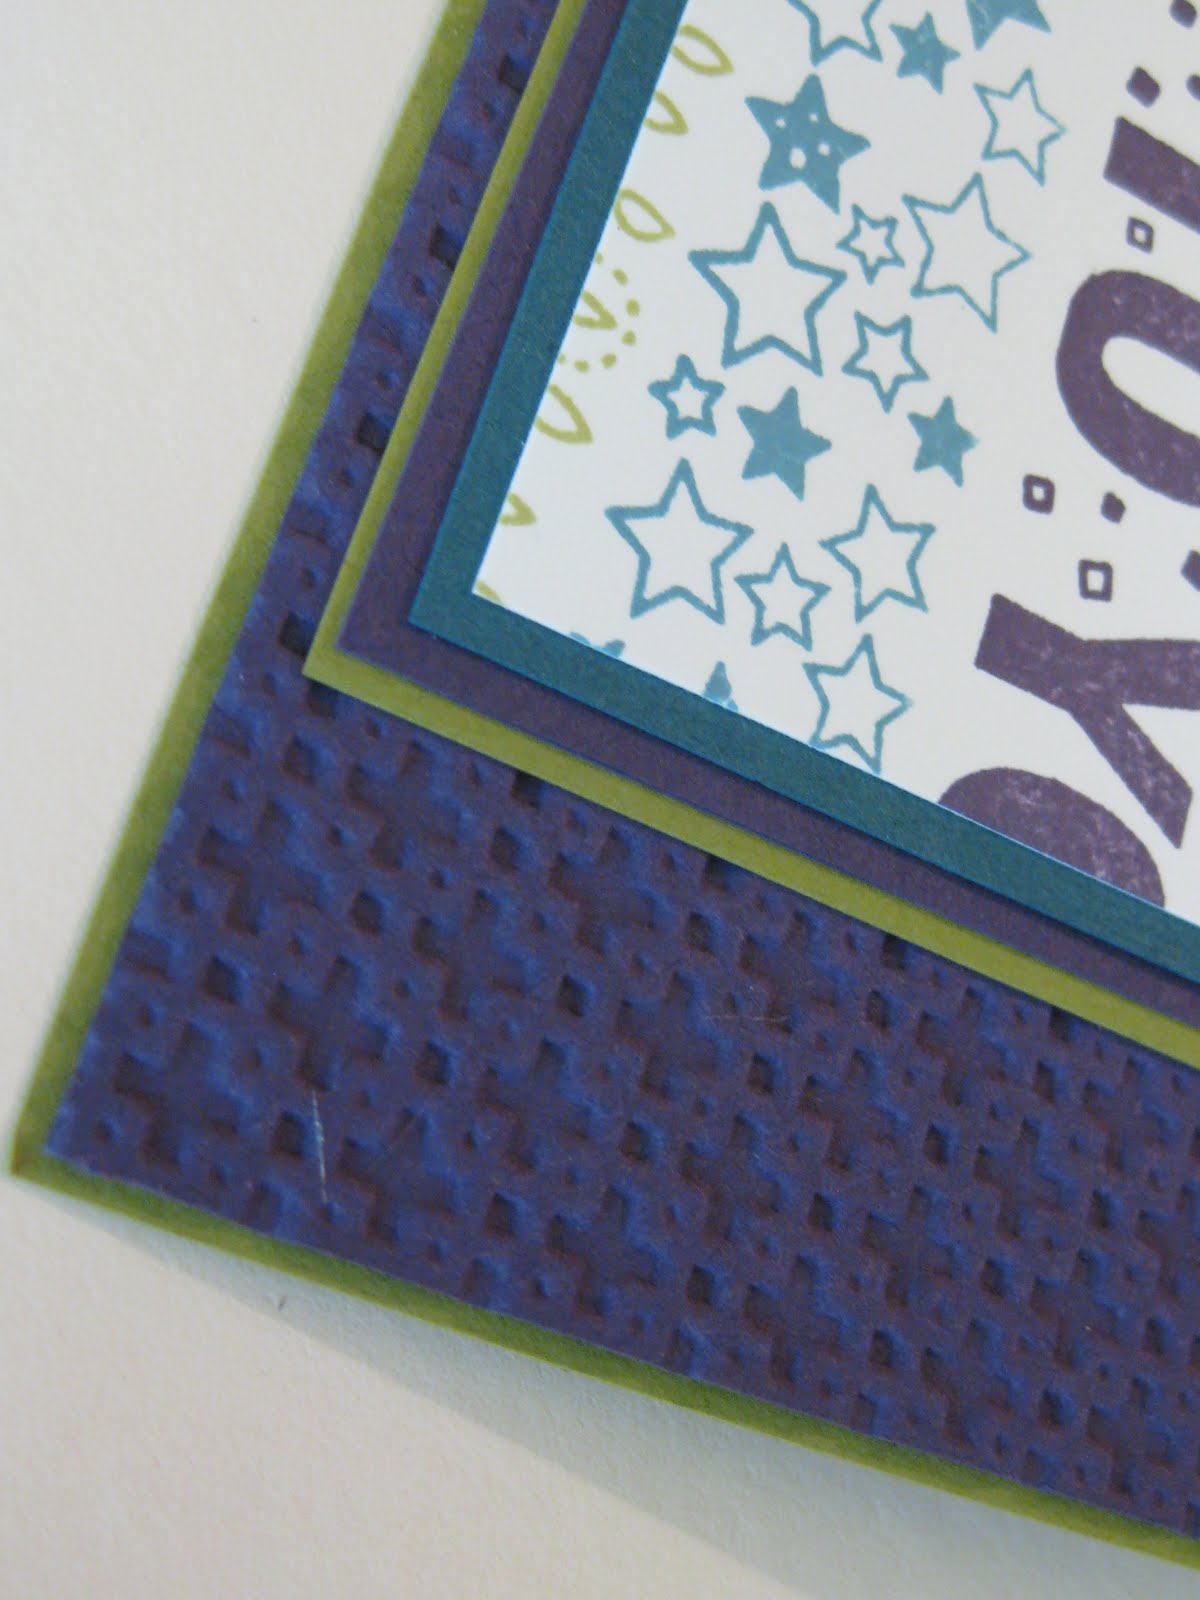
This first swap uses the Square Lattice embossing folder for the background layer, just like my "Mystery Image" post from yesterday. With Not Quite Navy, Elegant Eggplant and Old Olive loaded in the ink cartridge, I wheeled the "Birthday," "So Many Stars" and "Candle Crazy" wheels over full sheets of cardstock and then cut the sheets to size. After wrapping a piece of 5/8" Old Olive grosgrain ribbon around the wheeled layer, I added a sentiment from the "On Your Birthday" set that is punched out with the wide oval punch, and then backed with another wide oval punch of Elegant Eggplant. It's probably hard to see, but after punching out the eggplant ovals, I ran them through the embossing folder, and then when I layered them, I shifted the oval so that it is really only showing on the right side. On the left side of the sentiment, I inserted a silver Star Designer Brad, but then promptly covered it up with a punch-out made with the new "Itty Bitty Bits" stamp set and coordinating punch. I didn't really want to cover up the silver star that is in the brad, but somehow I needed to add a little more color to the center to balance everything. (How's that for an "un-official-no-I-don't-have-a-design-degree/don't-have-the-foggiest-idea-why-it-should-be-this-way" reason!)

Since I really seem to like lots of flowers and cheery, girl-y colors, I was relatively pleased with how this more-masculine-themed card turned out.
In my post of the "You make me happy" pup, I used the side of the Square Lattice embossed sheet that showed the "plus" signs. For this swap I used the side that the name of the folder implies:
 This side looks more like intertwined squares or a trellis. Kinda cool that one folder provides two looks!
The second of my swap designs also uses 2 of the new wheels, but in a brighter color scheme. The focal point of this card uses one of the new "ala carte" stamps called "Birthday Block" that is on p. 41 of the Summer Mini. I embossed that image by first stamping the block on my Versamark pad and then immediately going to my Tempting Turquoise Classic pad and finally to the paper. (Adding the Versamark to the stamp helps make the image a little more sticky and allows the clear embossing powder to stick.) After heat embossing, I used Real Red, Pumpkin Pie and So Saffron markers to color in "you," "happy," and the candle. Having the image embossed makes staying in the lines super-easy!
 The base of this card is black, not that you can really tell that, and what I did was trim off a 1/2" strip of the front. The Pumpkin Pie grosgrain ribbon is adhered to the very edge of the front of the card, while the Tempting Turquoise and Real Red pieces are adhered to the back/inside edge.The star embellishments are just cardstock punches with "black" brads holding the stacks together. I say "black," because I am always-and-forever out of black brads (while I have TONS of the 3 other colors that come in the Vintage brads set!) so I had to get creative. I have colored brads with my black Sharpie marker before, but for this swap I needed far too many to have the patience to do that, so I tried something new. I took some of my Rich Regals colored brads and pressed them into my black Staz-on pad to see how that would work. (I used a tweezers to prevent overly-messy fingers!) They looked good, but needed a while to dry--so if you're going to try this, allow extra time--overnight would be good.Now--on to the next project: cleaning up from all this creating! Hope you have a good day!









 Posts
Posts


